
To record voice and oral history that will inspire future generations, this article explores 12 tips from my experience as a professional biographer and life story interviewer. Before we get into the how-to tips, let’s talk about why taking the time to record voice matters. The human voice is an intimate medium that triggers powerful emotions after a loved one is gone. What would you give to hear someone’s voice again?
My dad singing around the house was the soundtrack to my childhood, and one year at Christmas I asked him to sing into a cassette recorder. I couldn’t know when I was 20, that one day I would have a daughter named for him and how valuable this voice reording would be for both of us. This recording is the primary way she knows her grandpa. Watch this video and I think you will get why I’m passionate about this medium:
In my line of work telling people’s stories, I work with oral histories almost daily by recording voice interviews. I have tinkered with many tools and some are decidedly better than others. I hope this legwork saves you time and aggravation. Now let’s get on with those powerful recording tips.
To record voice interviews, here are our most important suggestions.
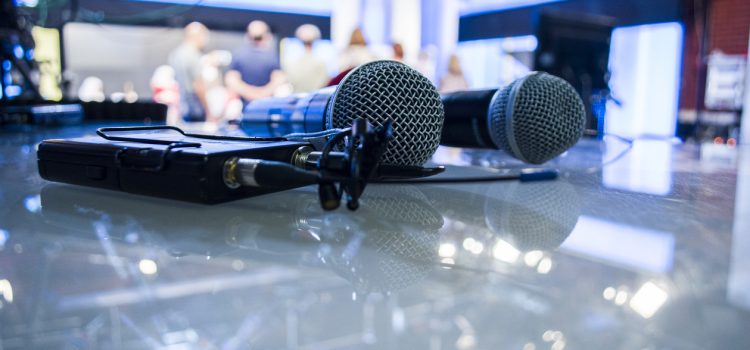
Tip 1 – Get your space ready:
 When possible, record voice in a soft-sounding room with carpet and drapes. Avoid restaurants and outdoors. If the venue is a family picnic or campsite, consider investing in a lapel mic with a windscreen. Windscreens look like a lucky rabbit’s foot and can be purchased online for a few dollars. It might seem obvious, but set some ground rules for the interview to avoid distractions. Ask family members not to interrupt, and for Pete’s sake, nobody should answer their phone during the interview. Move the dog elsewhere. You get the idea.
Tip 2 – When recording voice, USE A BACKUP!!!
In conducting life story interviews, I have needed the backup audio file more times than I care to admit. Trust me, Plan-B is worth the effort because magic may only happen once. You will be so disappointed if the batteries go dead, the memory fills up, or the lapel mic is plugged into the headphone jack (yeah, that happened).
Also, I like to set the backup recorder nearer to any additional interviewees to better catch what they say. The good news is that most people have a smartphone or tablet which can serve as a duplicate recorder. Next, don’t be stingy when it comes to batteries. Just put some new ones in, will ya?
Tip 3 – Consider using a digital recorder:

![]() I am a big fan of digital recorders for recording voice and oral history. The learning curve is easy and the price is not crazy for a good little workhorse (generally under about $60). Here are two models I use often, made by respectable brands: The Sony ICD PX370 and the Olympus Ws-852. I got a similar Philips brand free with my purchase of Dragon voice recognition software, and while it is adequate, it feels cheaper and I just don’t like it as well.
I am a big fan of digital recorders for recording voice and oral history. The learning curve is easy and the price is not crazy for a good little workhorse (generally under about $60). Here are two models I use often, made by respectable brands: The Sony ICD PX370 and the Olympus Ws-852. I got a similar Philips brand free with my purchase of Dragon voice recognition software, and while it is adequate, it feels cheaper and I just don’t like it as well.
Anyway, the two mentioned above are smaller than a Snicker’s Bar (not the King Size either), they come with a USB connection, use 2 AAA batteries, and have oodles of memory for recording many hours. I especially like how the USB connection is built into the Olympus so you never have to hunt for a cord. You can add a micro SD card if you like, but I don’t bother. There is plenty of built-in memory for many hours of audio and it’s good practice to offload files right away so you don’t risk losing them.

Bigger isn’t always better
As a side note, I did spring for a beefy Olympus LS -100 recorder which has a gazillion options you will never use for a family history interview. It’s about four times the size of the small ones and has fancy features including multi-track recording for musicians, plug-ins for high-quality microphones and more. I don’t mess with any of it, and find that extra menus get in the way. I have even made mistakes fiddling with dials and accidentally lost audio. The sound quality is very good, but the smaller versions are more than sufficient for everyday voice recording.
In general, these little recorders are straightforward to use, have great battery life, excellent storage capacity, and are easy to carry. The bottom line: If you plan to do multiple interviews and can afford the $40 or $50, you’ll definitely enjoy the digital recorder. This holds true even though smartphone apps are free. Apps have their place, and I really thought they would take over as my go-to device but I keep coming back to digital recorders. The best tool for the job, I guess.
To see reviews of digital recorders I use regularly click here or click here for details on my favorite one.
Tip 4 – To record voice, smartphone/tablet apps are free or cheap:
How great is it that smartphones have a built-in voice recorder? The convenience and price can’t be beat. The recording quality on Apple products is remarkably good, although even Apple is not quite as good at filtering out background noise as digital recorders. Still, cellphone or tablet, any of these options will do in a pinch. You can even use the built-in microphone on a computer or laptop as either a primary or backup recorder.
Don’t sacrifice convenience for quality
So what are app drawbacks? As mentioned, the sound quality is not not as good as with digital recorders. Also, be sure you set up your app to save to a memory card. Files can hog your memory or even stop recording mid-interview. I have been frustrated when I selected an app that limited the file size.
Some free apps cut off after a certain amount of time, and others won’t allow easy uploading if the audio goes too on long. So double-check limitations before you learn that hard way that your app stopped mid-interview.
Also, do a dry run with your equipment in advance. “Practice like you play.” In other words, record a longer file than just “testing 1-2-3,” and try uploading it afterward. You might not notice a problem until you work with a longer clip.
Tip 5 – Get help:
To record voice interviews, if you have someone who can handle the technology and/or bring a second recorder, then ask for some help.
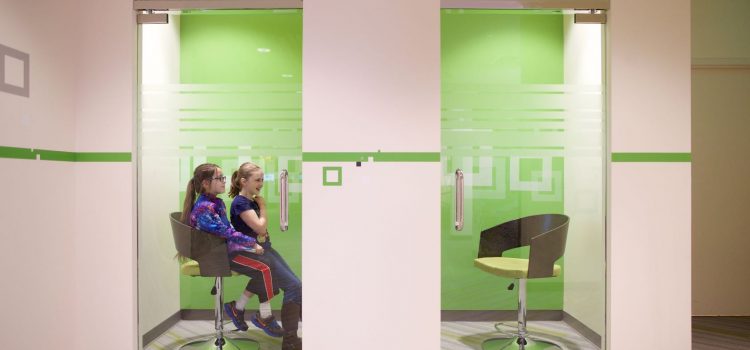
One amazing resource is the new state-of-the art recording rooms at History Centers sponsored by FamilySearch. They are experts in helping you tell your family story. A new one just opened in Layton, Utah, and there are others in places like Oakland, California. Check out Rachel Trotter’s article: Want to Learn More About Your History? The Family Discovery Experience Has You Covered.
Another resource is StoryCorps. They have two sound recording studios in San Francisco and Chicago and their mobile booth travels around. You can book time by clicking here. They also have a mobile app for recording short voice interviews on the smartphone. StoryCorps is a nonprofit and their services are free. If your loved one is a Veteran, look into oral history resources with the Library of Congress Veteran History Project, or a new Veteran Memorial Center being built in West Valley City.
As mentioned, we make part of our living doing professional interviews. If you would like us to interview your loved one or if you need help with your audio or transcription, get in touch with us. We would be delighted to relieve this burden for you.
Tip 6- Save voice recordings to the Cloud:
Audio files are large, even in a compressed MP3 format. This means that emailing them can be problematic and sometimes even uploading can present challenges. As mentioned, some pared-down free apps limit file sizes, so it might be worth springing for full functionality. I’m not going to get into depth here regarding which cloud service to choose, but I did find a great review site that stays current on over 50 services and ranks their favorites. Click here if you want to check out reviews of cloud services.
Speaking of audio file types, you might be wondering if you should save your voice recordings in WAV or MP3 format. For general life story interview purposes, save in MP3 since FamilySearch cannot take WAV files and converting can be a stumbling block. Also, it’s just easier to work with compressed audio files. The loss of quality is not noticeable to most people.
Here are two options for saving audio files to the cloud.
Option 1: Upload audio to a service like DropBox, Google or iCloud: This requires that you link the app to whatever file service you use (e.g., DropBox). If your phone/tablet automatically backs up files to the cloud, this means you already have a service set up. Ideally, connect your smartphone to high-speed WiFi because these files can take a while to save and will use data. Then open the recorder app, go to the save function and select the service you use. While it might be easier to email it, the file size is likely prohibitive.
Option 2: Pull the audio file off your phone/tablet/digital recorder using a USB cord: If you are purchasing a digital recorder to record , spend the extra $10 to get a model with a USB connection. I did not realize at first that the price difference is because cheaper models rely on memory cards instead of having a USB cord and port. That creates a hassle you will regret. Trust me, file management is the least-fun part of the process, so do anything you can to streamline it. Otherwise you will put this housekeeping task off and risk losing the audio altogether.
Did you know that most phones can connect to a computer using a USB cord or Apple Lightning Cord? Plug your phone to your computer, then select the file (using “Finder” on a Mac or “Windows Explorer”). Then drag, and drop the file from your device into the right folder on your computer. This is faster than using WiFi.
 Tip 7 – Use Audacity to edit audio:
 Tip 7 – Use Audacity to edit audio:
Audacity is the best software I have found for home audio editing. It’s free, reasonably straightforward to learn, and quite beefy. Basic functions include:
- Converting file types (e.g., from WAV to MP3)
- Deleting dead air
- Smoothing out background noise
- Combining clips together
- Trimming clips to get only the segment you need
- Digitizing older formats. You can even connect a CD Player or Cassette Recorder to digitize old recordings! All you need is the Audacity software installed on your computer and an audio cable to connect the input/output jacks.
There are many tutorials on YouTube and elsewhere to get you started using Audacity and to learn its features. Here is a link from the source to download: http://www.audacityteam.org/download/
Tip 8 – Share recordings with family and with the future:
Be sure to save a backup audio file somewhere long-term! Will you be able to find the file 5 years from now when a family member asks, “Do you know where that interview is of Grandpa?” What if something were to happen to you? If you’re taking the time to record voice, make sure someone can find that treasure later. Here are some options for sharing:
- Flash drive (thumb drive): This is one of the easiest, least inexpensive ways to share an audio file.
- Burn a CD or DVD: If you burn your audio files to a CD, know that there are two file types: audio and data. To listen with an older CD player, it needs to be saved in an audio format. If you just want to share or save a backup of the file, burn the CD in a data format. If you give a data CD to someone, make sure they know they can’t pop it into their CD player.
- Share/Save using DropBox, Google, iCloud or similar service: Once you have saved your audio file to the cloud, then services like DropBox allow you to share a link to the file by email, even if the person does not have an account with that service. The recipient will receive an email and can click on the link. Then they can open or download the file on their own device.
- Upload to FamilySearch or another genealogy site: Audio files smaller than 15 MB may be uploaded. If bigger, they must be converted to a smaller format (like MP3 or MPEG-4) or edited into shorter audio chunks. For help, consider visiting a family history center or reaching out to us for guidance: https://evalogue.life/contact-us/
- Transcribe it: Although I love audio because it is so intimate, changes in digital formats or the loss of computer files can mean an interview is gone forever. The printed page, however, can be preserved for centuries. This leads us to the next tip.
Tip 9 – Save Labor with Transcription Tools:
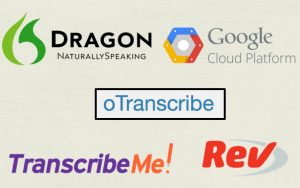
Transcriptions are valuable family history documents, and can be helpful when writing stories later. How to do transcription warrants more detailed coverage so check out the article link below to learn the latest-and-greatest ways to transcribe voice recordings, including Dragon voice recognition software, Google Speech-to-Text, oTranscribe (a free online app that mimics a foot-pedal dictation machine, read our review), and three professional transcription services. You can read here about Transcription and Voice Recognition Tools.
Tip 10- Combine audio, photos, music and narration to make video stories:
There are some great video tools that make it fun and easy to tell a story. Nowadays anyone can combine audio, short video clips, photos, music and voice narration to tell compelling family stories. If you really want to engage family members, bring in more senses and keep it S-H-O-R-T! Young people are more visual than ever, but expect to get information quickly. Emotions are evoked with music, images and a story line. A good rule of thumb: keep each vignette less than 2 minutes. If that seems impossible, check this example of a personal story I made using Adobe Spark.
Free Adobe Spark:
First, if you want to see an example of how it all comes together with a free Adobe Spark account, pre-built templates and stock music, check out the video below. With Adobe Spark there is no software to download, so in minutes you can open a free account and get started. I created this short video to tell about something uncanny that happened to me. (Yes, you can use these tips to record your own voice!)
One advantage of Spark is it includes the ability to add voice-over narration to each slide, making voice recording very simple and natural. Also, its prompts guide you to map out a good story. When you are done, you can download the video and save it, post it to YouTube or share on social media.
Here is a quick tutorial I made showing how Adobe Spark works.
Animoto:
The next video tool (that I learned about at RootsTech) is Animoto. Their templates make slick videos you will be proud to share, and with ridiculously little effort. Animoto requires a subscription, with the cost starting at $8 a month. Click here to get 10% off an annual plan with our coupon code. They also offer a free trial.
Here is a video my family made using Animoto. It was inspired by the FamilySearch challenge to post recipes and an accompanying family story. We made an evening out of the challenge and created new memories around an old tradition.

Related article: Review of Animoto
Tip 11 – Good interviewing is more important than flawless audio:
I must not fail to mention that no technology can substitute for conducting a great interview in the first place. Asking engaging questions, putting your subject at ease, and intently listening mean a lot more than crisp sound. Finally, please remember this. Someday, a recorded voice will mean the world. I have to repeat this question: What would you give to hear someone’s voice again? If you do it now, I promise, it will be enough.
Even one single oral history interview is more than most humans have ever left behind. So please move ahead now and record voice while you can. The best time is now and “done is better than perfect.” If you need some help, check out our easy tutorial for capturing an oral history in one sitting. Here is the link to our free mini course. Also, here is an additional link to a summary page for great interview questions and interview-related articles.
Oh, and here’s another reason I urge you to record voice now: The video below is an animated vignette my husband made from an interview with his grandfather, who died before he was born.
Tip 12 – Let us interview your loved one
Of all the services we offer, life story interviews are our most popular. We have years of experience recording voice and documenting people’s precious lives. If you would like a professional to interview your loved one, let us do it! Here is a link to our life story services.
To record voice, here is a quick list of related articles and resources:
- Would you like us to present this topic (or something else) to your group?
- Product review: Voice Recorder Olympus WS-52
- Product review: Voice Recorder Sony-icd-px370
- Free Voice Recording Apps Are Convenient, Create Great Memories
- Voice Recorder Apps – are they as good as they say?
- Transcription and voice recognition tools
- Our review of oTranscribe, a free DIY option for transcribing audio
- Questions to ask your parents or grandparents
- Free mini course download – how to conduct an oral history interview
Disclaimer: This article contains affiliate links which means we make a commission on some (but not all) of the products and services mentioned here.

By Rhonda Lauritzen, who is the founder and an author at Evalogue.Life, where we tell personal and family stories that inspire. (Let us help you tell yours!) Rhonda lives to hear and tell about people’s lives, especially the uncanny and dig-deep moments. She and her husband Milan restored an old Victorian in Ogden, Utah and work as a team, weaving family and business together.
Do a family history interview

Sign up and we will email you a free, printable download of our mini-course to conduct a great oral history interview. You will be done in a week or less.
Great RootsTech presentation, 8am March 1st. Thanks for your effort and information. Very very helpful!
Joel, thank you for taking a moment to let us know that you attended the class and that it was helpful for you. A note like this makes our whole day, and makes the preparation feel so worth it.