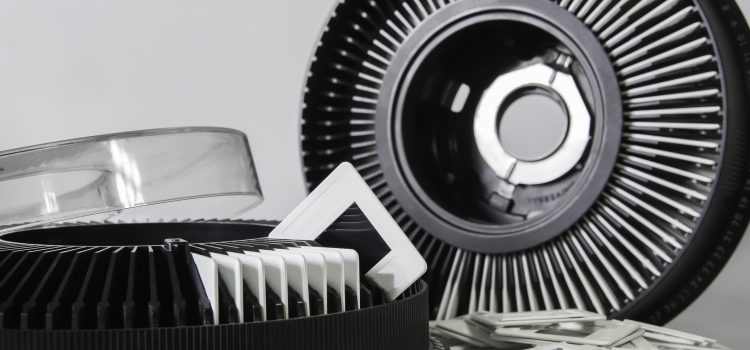
If you are wondering how to digitize slides, photos, audio, and other heirlooms you have come to the right place. In our work telling people’s stories, we do a LOT of digitizing of old media. We often have to quickly get through boxfuls of material, digitize photos, and capture large amounts of reference information. Sometimes we need the highest quality we can get, while other times efficiency is the name of the game. This article is an overview of the field-tested methods we use, organized as 12 tips.
(Disclaimer: This page contains a few affiliate links which means if you purchase a product on Amazon with our links, we make a small commission. We really appreciate it! This is a tiny part of our income, but every bit helps.)
Here is an index of what is covered in this article:
- Digitize slides and other media for free at FamilySearch centers, genealogy societies, and public libraries
- Digitize slides with a slide imaging gadget
- Test a few images before you do a whole batch
- Digitize cassettes with a cable and Audacity or Twisted Wave
- Digitize cassettes with a USB capture unit
- Scan photos with your printer
- Use photo scanning apps to digitize images and remove glare
- Take photos of scrapbooks and other family heirlooms with your phone or tablet and a light box
- Take photos of images outside on a cloudy day
- Scan stacks of photos and documents with a feed scanner
- Use OCR technology with a feed scanner to convert documents to text
- Use archival weights and white gloves
- Transcribe audio using slick technology tools
- Transcribe letters and articles using speech-to-text
- Digitize slides beautifully by sending them to the professionals. The same goes for images, audio, and video
- Professional Photo restoration
Tip #1 – Digitize slides and other media for free at FamilySearch centers, genealogy societies, and public libraries:

Many family history centers have flatbed scanners and other equipment to digitize slides, and cassettes for free. Call ahead to find out the equipment they have, and make an appointment in advance. For example, here in Utah some of the family history centers have They may even have specialty equipment such as a large format scanner for blueprints.machines that can digitize slides by the entire carousel in a matter of minutes. Make an appointment and you’ll get an hour on the machine. Here is a full article by FamilySearch about free services to scan photos.
Also, their flatbed scanners are ideal if you want high resolution images and friendly staff to help you use the equipment. Some also have light boxes or equipment to digitize cassette tapes. Make sure to plan your time so you will be able to digitize everything you need.
Related tip: also try your university library and/or the special collections department for scanning equipment Local universities are often seeking local history and will help you digitize important items. They may even have speciality equipment such as a large format scanner for blueprints.
Related tip: Did you know most U.S. public libraries and universities have subscriptions to Newspapers.com? If you need to research old newspapers, you can do it without having to pay for a subscription by taking a flash drive to your local library.
Related video – tutorial replay from a class on how to organize a large writing project
Related article: How to not waste time with sentimental stuff when you move.
Tip #2 – Digitize slides with a slide imaging gadget:

If your slides are not the super thick kind and if you do not need high-resolution images, you can digitize slides using a home imager. Many consumers are happy with the ability to get through a lot of slides quickly. Wolverine Titan is generally considered the best entry-level scanner. These are not scanners, but rather, take photos of the slides. I equate this to using a light box/ShotBox (see below). It gets the job done efficiently, especially if you have a large quantity to do. Just don’t expect to get high-resolution images. This method is generally adequate for 4 x 6 prints, or sharing on social media. It would also be useful if you want to see what’s on all your slides so you can focus your high-resolution scanning on the ones that matter most. If quality is important to you, then bite the bullet and either send your slides out to a service, or invest in more professional equipment. (Note: Gaylord Archival wrote a good article on how to preserve slides. You can read it here.)
Related article from a colleague – Apps for scanning negatives
Tip #3 – Test a few images before you do a whole batch:
Word to the wise: Before you digitize a whole batch of slides or photos be sure to pull up some sample images on one of the computers to make sure you are getting the quality you need.
Case in point, I was once excited to use the copier/scanner to digitize photos at a FamilySearch because it had a bigger image bed than anything else and I had some large photos. The problem was when I pulled up my images home, there were streaks down the middle of every photo in the same spots. The drum must have been damaged. Hence, my entire visit was wasted. I have read this same advice about other types of scanners: make sure there is no dust or other problems with the scanner before you invest a ton of time and find your work unusable.
Tip #4 – Digitize cassettes with a cable and Audacity or Twisted Wave:
You can connect a CD or cassette player with a cable like the one shown above (click here to see it on Amazon). You connect a cassette player to your computer and digitize it for free using open-source Audacity software. I have used both Audacity (free, open source) and Twisted Wave (paid, but more user friendly) for editing audio files. Check out this YouTube video for how to complete the process with Audacity.
Click here to watch a YouTube video showing how to convert cassette tapes to MP3 with audacity.
Tip #5 – Digitize cassettes with a USB capture unit:
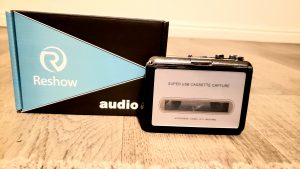
I also own an inexpensive unit called a Reshow Cassette converter. It looks like an old Sony Walkman. You play your cassettes and it digitizes as it goes. I haven’t tried it yet, but will update this article as soon as I know more. Remember that the FamilySearch centers often have equipment like this so you may be able to do it for free there. Call to find out.
Tip #6 – Scan photos with your printer:
Most home printers these days have a scanner function and the quality is terrific. With my HP color printer (the HP Office Jet Pro 8035) I can insert a flash drive and scan all my photos to it.
Here is a quick video where I show how to scan with a printer:
There are some limitations, with home scanners, however. First, most image bed sizes only go to 8.5 x 11, although I specifically purchased my model because it had a larger scanning bed (8.5 x 17). Anyway, the bottom line is that your printer scanner will only work for photos that size.
Caveat: You must remove your photos from the frames. If you try to digitize your photos in a frame or behind glass, it will sit too high from the scanner and your image will be blurry. be sure to change the settings to high-resolution.
The combination of a feed scanner and my ShotBox work great for efficiently processing quality. (Read below for reviews of these).
Be sure to change the settings to high-resolution, and also to select the option to scan it as a “photo” and not a “document.” If your printer scans everything as a document, you’ll probably be disappointed with the results. However, I get nice quality with mine on the photo setting.
That said, you will want to check the kind of quality you get because I hear that all-in-one scanners are not as good as flatbed scanners that have better optics for this purpose.
Tech note: my scanning was done with HP OfficeJet Pro 8720.
Tip #7 – Use photo scanning apps to digitize images and remove glare:
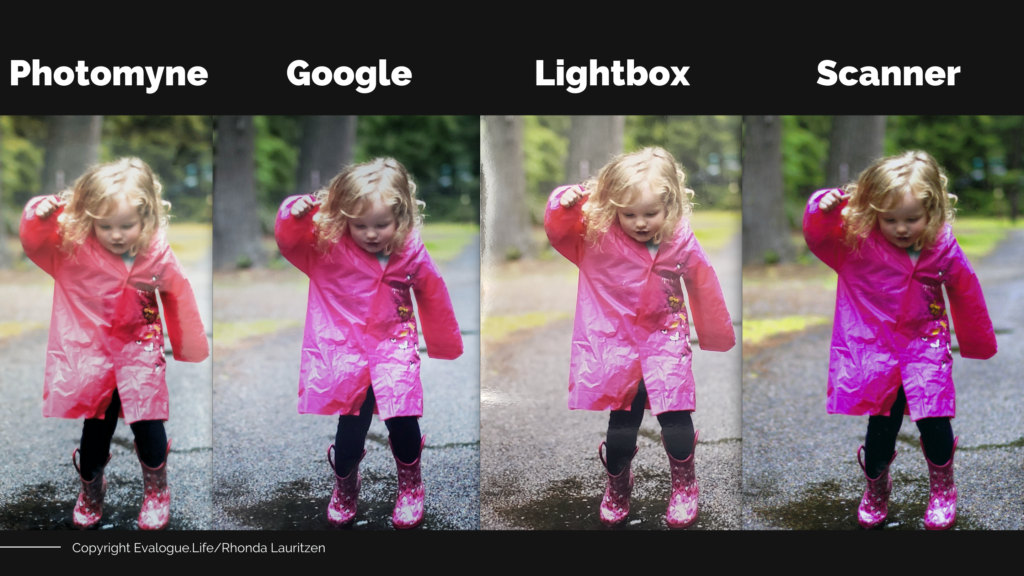
Two apps are now on my radar for quickly scanning and cropping images.
- Use the free PhotoScan app by Google to digitize images and correct glare. This app is easy to use and corrects glare. It also integrates nicely with the Google Photos app. Here is where you can learn more about it: https://www.google.com/photos/scan/
- Photomyne is a photo scanning and app that has a free version and has a paid service. It is getting good reviews. A big benefit is the auto-crop function. I have only tried the free version and realized you can’t get a print-quality image with it, so it’s not part of my toolkit right yet. However, I am considering trying the paid version because manually cropping images can take a lot of time.
- Tech note: the phone I used for taking the images with the Photomyne app, Google PhotoScan, and with the light box was: Samsung Galaxy Galaxy S9+
- Here is a quick intro video:
Tip #8 – Take photos of scrapbooks and other family heirlooms with your phone or tablet and a light box:
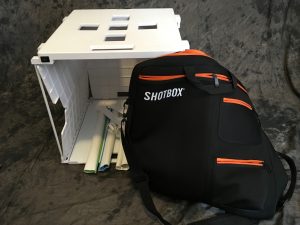
One of my favorite tools is The ShotBox, which I bought at a family history conference a few years ago. I use it extensively to photograph artifacts related to a historical research project, and it has been an amazing timesaver, providing very high-quality photos using my iPad or phone. I have now taken thousands of images of books, photos, heirlooms and artifacts. There are less expensive light boxes out there, but I love how the ShotBox is portable. Another key difference is that most light boxes are meant to take pics head on. They are commonly used for taking product shots and that sort of thing. In contrast, the ShotBox has holes on the top so you can put your phone or tablet on top and take images looking down at your pics or heirlooms. This is what you need if you are to digitize books and things like that.
Benefits of using the ShotBox (or another light box) for digitizing:
- It provides uniform, high-quality lighting with some anti-glare components and settings.
- It takes photos from the top of the box like you need for digitizing photos and books.
- It keeps the camera still so your images are crisp. (But don’t bump it! It seems obvious, but it is easy to do while you are working.)
- Positions the camera an equal distance from the target: If you are digitizing a book, this ensures consistency.
- Keeps hands free. One hand can flip pages and one finger can snap the photo.
- Stabilizes the camera: It eliminates blurriness from your hands shaking.
- Faster image capturing than scanning, and the ability to handle odd-sized objects and books. All of it is click, click click. Also, it is portable so I can take it to wherever I am doing research. I usually take it with me whenever I visit a special collections library.
Related video – short overview of how to digitize with a light box (Shotbox)
Tip #9 – Take photos of images outside on a cloudy day:
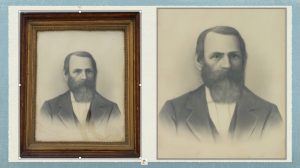
Another tip is to take photos outside on an overcast day. This is my best workaround when I have large photos, anything in glass where I have to avoid glare, or in a pinch if I don’t have my light box with me. Cloud cover eliminates shadows and provides perfect, uniform light. You really can’t beat it. I like to set artifacts and documents on a weathered wood surface if it won’t damage the items because the wood provides a pretty backdrop.
Tip #10 – Scan stacks of photos and documents with a feed scanner:
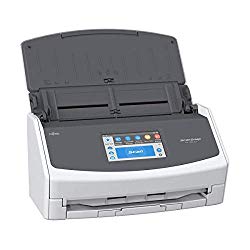
A few years ago I invested in a desktop feed scanner. I did the research and my choice was a ScanSnap desktop scanner. I have the Fujitsu IX500, but it looks like the Fujutsu IX1500 is the latest model, and it now costs less as they phase out the older model. I have never regretted spending this money to help with my home office organization and have used the heck out of it. First, I will say that this unit has quality construction and is meant to handle daily use. You can put in a stack of papers, hit scan and it beautifully feeds them through. The same is true with business cards. I run stacks of business cards through it from events, and the text recognition is quite good. Then it has a feature to export into my Outlook contacts. Slick!
I also purchased a stack of carrier sheets for digitizing photos and odd-sized documents. These are transparent sheets that almost look like sheet protectors (but thicker) and feed without getting caught on ragged edges. They are kind of expensive (at a little under $50 on Amazon) but have been good investment for my professional work.
This scanner helps keep my office (more) organized per training from Getting Things Done and The Life Changing Magic of Tidying Up methods, and allows me to quickly scan and send documents to run my business. As an example of how it comes in handy, I digitized several boxes of paperwork before we did our last move using this baby. It can scan as an image, PDF, and in high, low or medium resolution. It also comes with OCR text recognition software.
Tip #11 – Use OCR technology with a feed scanner to convert documents to text:
One of the best uses for my Fujitsu feed scanner has been to use it with the software that can convert the scans into text using OCR technology. When I am doing a large research project and have a lot of printed documents I need to convert to searchable text, this has been a lifesaver. (Note: If it’s a short letter or article, it is faster to read it aloud and have speech-to-text technology dictate it for me, but this is exhausting s for long documents).
Tip #12 – Use archival weights and white gloves:
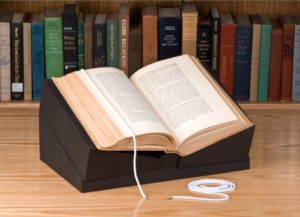
I have long-known that when handling precious artifacts and photos, one should use cotton gloves. What I didn’t know for the longest time was that there is a tool that helps pages lay flat. This is necessary if you want to digitize them by taking photos. Before I got one of these, you should have seen me trying to hold pages down, keep my hands out of the photo, and still take the picture. (It’s almost impossible if multiple parts of the page are curling up.) Last year I was at a special collections library and they had these cool snake weights. I thought, Where have you been all my life?
Tip #13 – Transcribe audio using slick technology tools:
I love preserving voices because they are so intimate and powerful, there is also no substitute for the printed word in terms of longevity. Digital formats fail, but we have books that have endured centuries. For this reason, I recommend getting a transcript of your audio. Also, transcriptions make it easy to search for details if you are writing a story. The bad news is that it’s a pain. I’ve done a ton of experimenting and research over the years, and have written a comprehensive article explaining different transcription methods and how to go about each. I update this article whenever I get new information. It covers how to use Google speech-to-text, Microsoft 360, oTranscribe, and professional services.
Related article: how to transcribe audio
Related article: round up of our best how-to articles for how to capture, edit and transcribe audio
Tip #14 – Transcribe letters and articles using speech-to-text:
I should have figured this trick years earlier because it’s so elegant. When you need to type up a document such as a handwritten letter, transcribe a journal entry, or quote the text of a newspaper article, it’s slow to type it by hand. Instead, just turn on your computer’s microphone and read it using speech-to-text technology.
Here is a quick tutorial video where I show you how to do it using Microsoft 365. The same principles apply with a Google Doc. https://youtu.be/Y2x2LWIZ0Nw
Tip #15 – Digitize slides beautifully by sending them to the professionals. The same goes for images, audio and video:
There is a time and place to send your media out. We often visit our friends at Larsen Digital and just pay them to do certain jobs the right way. They have returned beautiful results for us on reel-to-reel audio, old film reels, and high-resolution photo digitizing.
Here are times we hire professionals to digitize our media:
- When we need high-quality: They do high-quality work on audio or high-resolution images for printing.
- If audio or video is precious: They properly clean the media first to avoid permanently damaging it.
- When we do not have the equipment: A photo might be too large to fit on our scanner bed, or we need reel-to-reel audio done.
- When we don’t have time: Sometimes we could scan every page ourselves, but we are on a deadline or are over-booked with client work.
Tip #16 – Professional Photo restoration:
We have an in-house staff person who does professional photo restoration. Click here for the details!

Rhonda Lauritzen is the founder and an author at Evalogue.Life – Tell Your Story. Rhonda lives to hear and write about people’s lives. She believes that when you tell your story, it changes the ending. She and her husband Milan restored an 1890 Victorian in Ogden. She especially enjoys unplugging in nature. She recently completed the history of the Old Fort where Pioneer Park now sits, a project commissioned by Salt Lake City. Check out her books: How to Storyboard, and Every Essential Element. She was also the writing coach of bestselling author, Rob A. Gentile, who wrote Quarks of Light, A Near-Death Experience: What I Saw That Opened My Heart


Pingback: 16 Tips to Digitize Slides, Photos, and Different Household Historical past - General News Hub
Pingback: 16 Tips to Digitize Slides, Photos, and Other Family History | Meridian Magazine
Hi there thanks so much for speaking about this side of working in digital.
Pingback: Family history gift ideas from $0 to $200 - Tell Your Story with Evalogue.Life
I really like that you recommend people convert old audio cassettes and even VHS to CDs and DVDs. I never considered that this could be helpful to do until I realized that having 15 VHS tapes was a little cumbersome to store. This could be particularly helpful to keep the data from getting corrupt over time to help make sure there aren’t any issues if my kids want to access the videos when they’re older.
Thanks for this tip! We’ve thought primarily about preserving them, but you’re right, VHS tapes take up a lot of space!